

Support -> How to Change Advanced Messaging Options for Automated Emails and SMS
How to Change Advanced Messaging Options for Automated Emails and SMS
This guide will show you how to configure who receives automated e-mails and SMS messages generated by the scheduling software.
Step 1. Enter the "Messaging" Section
After selecting the "Advanced" tab in the "Settings" page, select the "Messaging" tab.

Step 2. Select When Appointment Reminders Are to Be Sent
In the "E-mail Reminders" section of the page, select the timing of email appointment reminders using the drop down menu.
If you wish to include a link in your email reminder inviting clients to log on an confirm their appointment, click the appropriate checkbox.
If you have subscribed to a paying account, you may also choose to send text message appointment reminders to clients that have agreed to receive notifications on their cellphone.
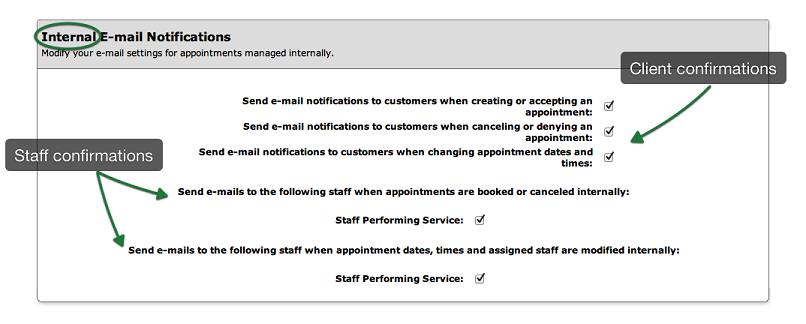
Step 3. Select Notifications to Be Sent for Internally Booked Appointments
In the "Internal Email Notifications" section of the page, check off the boxes to send email notifications to clients and/or staff members in different situations.
Note: These options are only for appointments or changes performed by a staff member using the internal calendars.
Step 4. Select Notifications to Be Sent for Appointments Booked on The Customer Portal
In the "Customer Portal E-mail Notifications" section of the page, check off the boxes to send email notifications to clients and/or staff members in different situations.
Note: These options are only for appointments or changes performed by a client using the online portal.

Step 4. Save Your Changes
Don't forget to click the "Save" button at the bottom of the page to confirm your changes.
© 2009 - 2019 datedechoix.com