

Support -> How to Create a Different Schedule for Online Booking
How to Create a Different Schedule for Online Booking
This guide will show you how to create an alternate staff schedule specifically for online booking.
Step 1. Enter the "Edit Schedules" Section
After selecting the "Staff" tab in the Settings page, select the "Edit Schedules" tab.

Step 2. Select the Employee Whose Schedule You Want to Edit
The option of having a different schedule for the customer portal must be set for each employee.
Using the drop-down menu, select the employee whose schedule you want to edit.
Step 3. Set the Online Portal Schedule
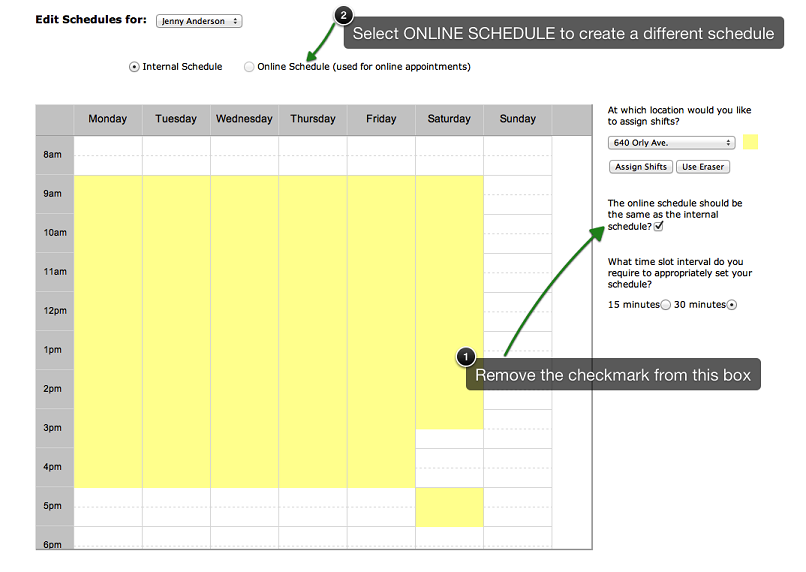
Once you have selected the employee, the employee's weekly schedule appears. You may select to have a Customer
Portal Schedule that is different from the Internal Schedule by removing the checkmark to the right of the schedule.
Once you remove the checkmark, the online schedule may be viewed by selecting the "Online Schedule" button above the
employee schedule.
You may now set your employee's schedule as you normally would.
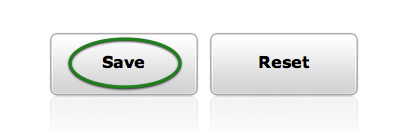
Step 4. Save Your Changes
Don't forget to click the "Save" button at the bottom of the page to confirm your changes.
© 2009 - 2019 datedechoix.com