

Support -> How To Add a Service
How To Add a Service
This guide will show you how to add a service in your online appointment software and configure settings for online scheduling.
Step 1. Enter the "Add Service" Section
After selecting the "Service" tab in the Settings page, select the "Add Service" option.

Step 2. Complete the Service Profile
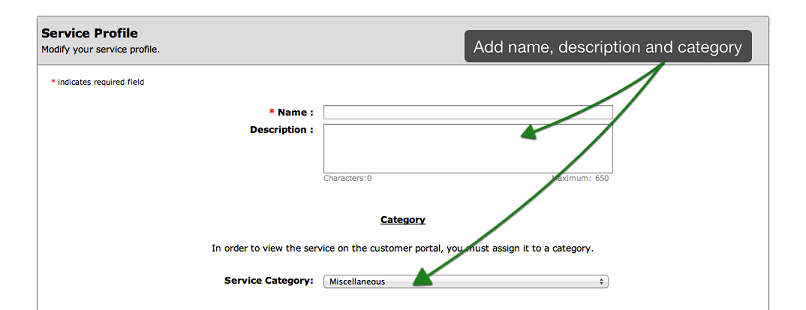
In the Service Profile section, enter the name of the service you wish to
add. You may also add a brief description of the service in the "Description" field.
The description will appear on the online booking portal.
Next, select the service category using the drop down menu. The default Category is "Miscellaneous" however you may create additional categories by clicking on the "Add Category" option on the navigation bar. Besure to select a category, as services associated to "Miscellaneous" will not be available for online appointment booking by clients.
Next, select the service category using the drop down menu. The default Category is "Miscellaneous" however you may create additional categories by clicking on the "Add Category" option on the navigation bar. Besure to select a category, as services associated to "Miscellaneous" will not be available for online appointment booking by clients.
Step 3. Select a Color For Your Service
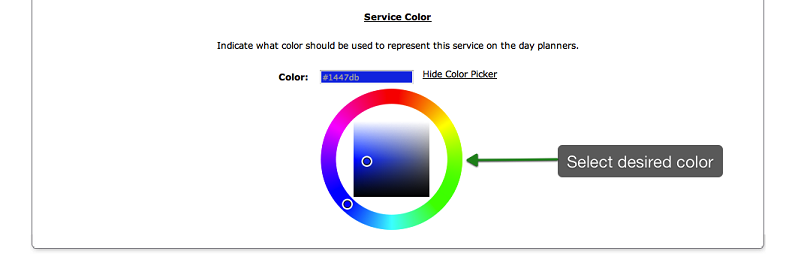
Click on the "Select a Color" link. Using the Color Selection Tool that appears, select
the color you wish to assign to your service by dragging your cursor to the desired color.
Please note that this color will appear in your appointment booking calendar when
an appointment is made for that service. You can also type the color value in the text box if you know the
exact color you wish to use.
Step 4. Select the Rooms Where the Service Will Take Place
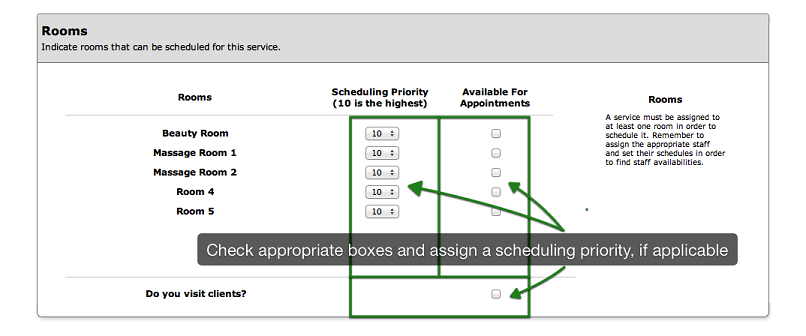
In the Rooms section of the page, select the rooms where the service will be offered by checking
off the appropriate boxes. You may also indicate that you offer services at the client location
by checking off the corresponding box. A service must be assigned to at least one room in order
to schedule it.
You may also assign a priority level to rooms. When appointments are booked online,
the rooms will be assigned to services according to their order of priority. Rooms will also appear
in their order of priority on the planners.
If you wish to enable or disable rooms, please contact technical support. The
room scheduling feature is especially useful when multiple staff members are sharing rooms.
Step 5. Select the Employees that Will Perform the Service
In the Staff section of the page, select the employees that will perform the service by checking
off the appropriate boxes.
The service must be assigned to at least one employee otherwise it can not be reserved.
Note that an employee may be assigned to a service for internal booking only.
To do this, please remove the check mark in the box under the column
"Available for Online Booking"
You may also assign a priority level to staff members. When appointments are booked online,
staff will be assigned to services according to their order of priority (if the client selects "No Preference").
Staff will also appear in their order of priority on the planners. This improves internal appointment management
when using the various booking calendars.

Step 6. Set the Duration and the Price of the Service
In the Duration & Pricing section of the page, enter the duration of the service using the drop
down menus for hours and minutes. Next, enter a price in the "Price" field for this duration
of the service. When done, click on the "Add" button and the duration/price combination will
appear in the list. To remove a duration/price combination, simply select the combination
from the list and click on the "Remove" button. To remove all combinations, click on the
"Remove All" button.
You must assign at least one duration to a service otherwise it can not be booked online.

Step 7. Set Your Online Scheduling Rules
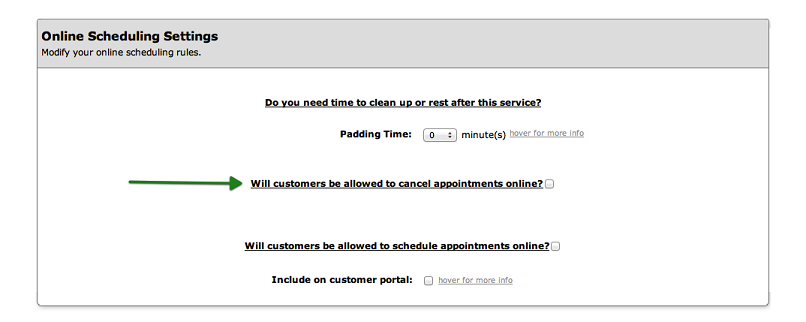
If you want your customers to be able to book appointments online through your Customer Portal,
the Online Rules section must be completed. In the Online Scheduliing Rules section of the page,
check off the online option box. In the section that appears after entering the check mark,
enter the various rules for online bookings depending on your business preferences.
In addition, you may enter a question for your customers to answer so that you may better serve them
during their visit. For example, you may ask them if they have any allergies or injuries your staff
should be made aware of.
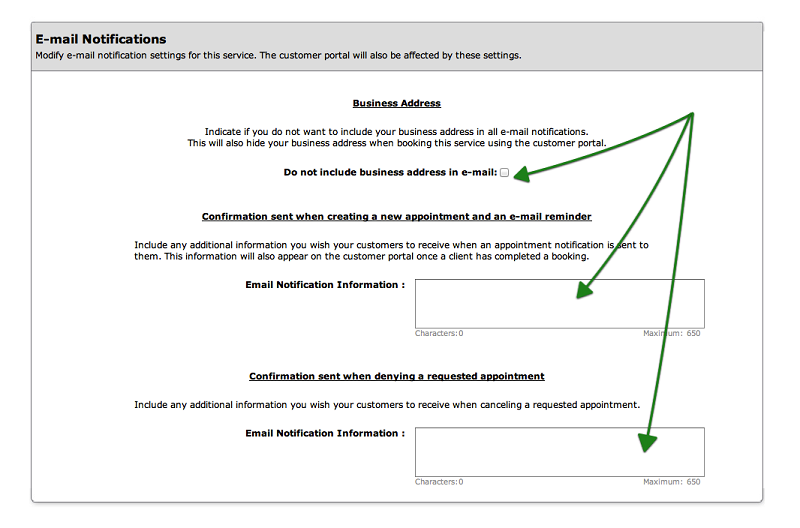
Step 8. Set Your Email Notification Options
This section allows you to configure the emails your clients will receive when they book an appointment.
In the Email Notification section of the page, select whether you would like your business address to appear
in notification emails by checking off the appropriate box. Next, enter any note you wish to add to the
standard email message. Click the following link for more information regarding notifications and reminders.
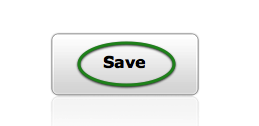
Step 9. Save Your Changes
Don't forget to click the "Save" button at the bottom of the page to confirm your changes.
© 2009 - 2019 datedechoix.com